Channel Settings
Account Settings is a dedicated tab available for each channel that allows to define some additional settings, specific only for this particular channel. Hence, not all channels will have this tab visible. Additionally, any setting that is defined within the Account Settings tab will be applied exclusively for this particular channel. Other channels will not be affected.
Your Airbnb account settings
With this procedure, you can connect to your Airbnb account for the first time and add a new Airbnb account to the already existing connection.
-
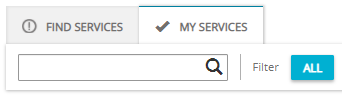
In Rentals United platform, go to the Services tab.

-
Click the My services tab.
-
Type the Airbnb name in the search box or scroll down through the list of available channels.
-
Unfold the Airbnb section by clicking the Down arrow button.
-
Click the Account Settings button.

-
Select Your Airbnb account details tab.

-
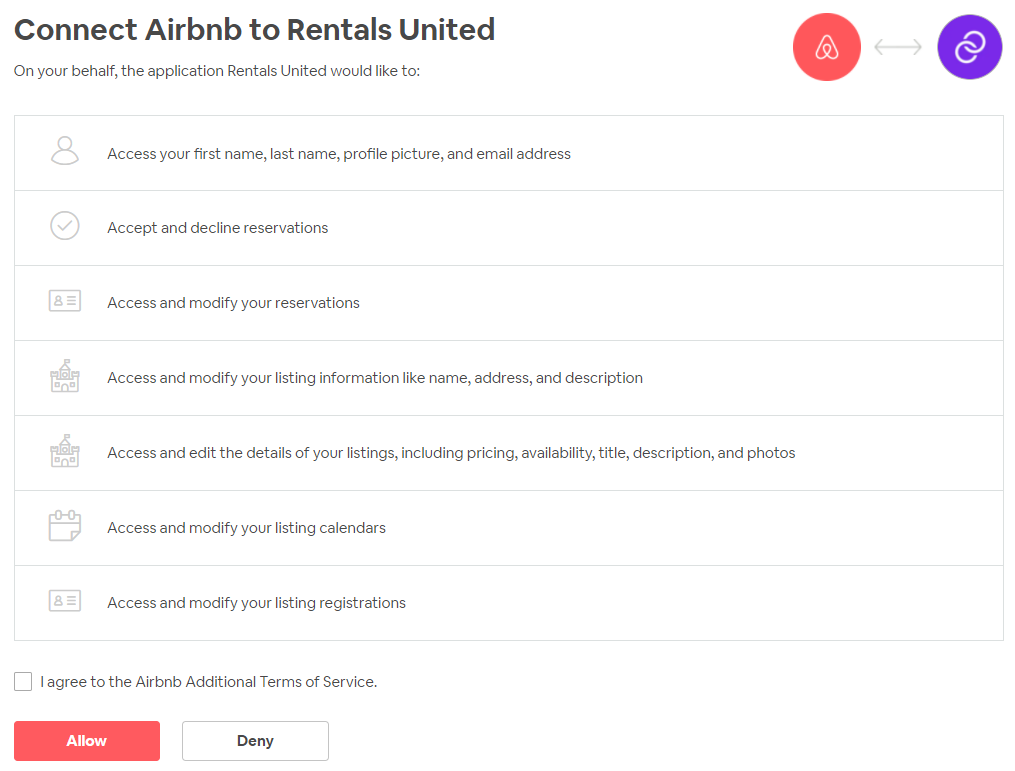
Click the Click here to connect Airbnb account.

-
You are directed to the Airbnb website. While connecting to Airbnb, the system will automatically detect your connection with Airbnb in the background and connect your account with the Airbnb account that you are currently logged in. Make sure that you are logged in to the correct Airbnb account (in case you have more than one account in Airbnb). Read carefully the terms and conditions and confirm by ticking the checkbox. Click Allow.
Minimum stay
This custom setting allows you to set a minimum value of the minimum stay for all your properties. It means that after setting the minimum stay in Channel Settings, all your properties with minimum stay below that value will have the new minimum stay sent to Airbnb.
Example: After setting the minimum stay in Channel Settings to 3, all your properties with lower minimum stays will have their minim stay matched to this new value. Properties with higher minimum stays will remain intact.
Property A: MS = 2 >> 3
Property B: MS = 3 >> 3
Property C: MS = 4 >> 4
For example, this setting may be useful when you want to temporary resign from short-term stays due to events taking place in the area (concerts, football matches etc.). It may help you avoid unwanted guests (in case you suspect your property may be damaged) and increase your revenue (as you sell more nights).
-
In Rentals United platform, go to the Services tab.
-
Switch tab to My services.
-
Type Airbnb in the search box or scroll down through the list of available channels.
-
Unfold the channel section. Click the Down arrow button in the channel box.
-
Click Property Settings.

-
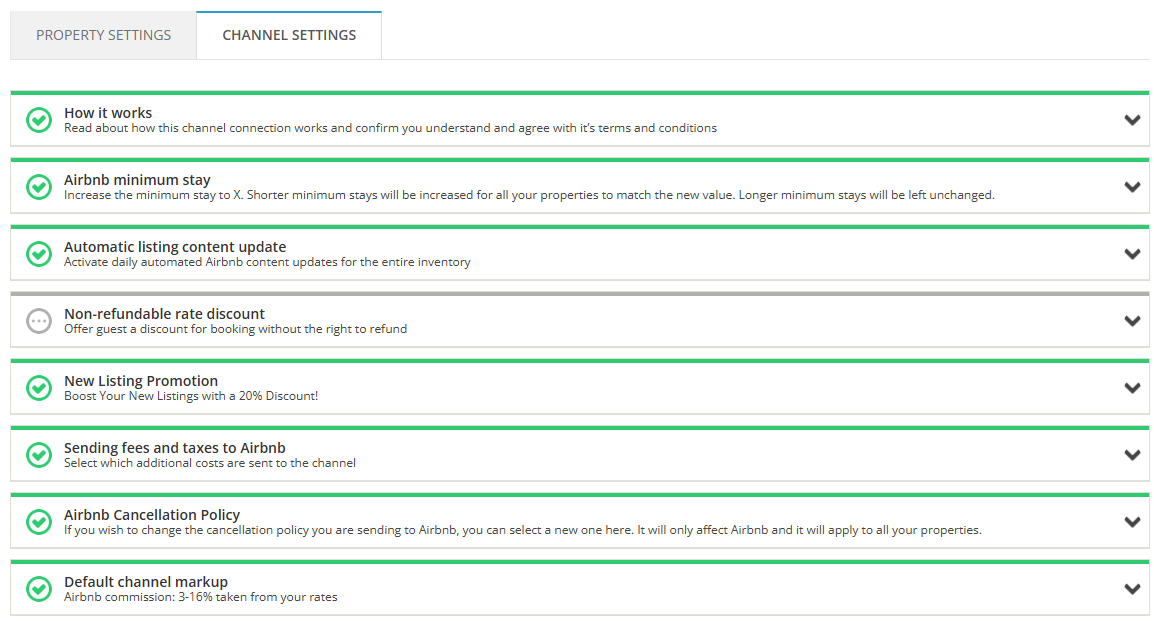
Switch the tab to Channel Settings.

-
A list of available custom policies opens.
-
Unfold the Airbnb minimum stay section.
-
Provide the value to which Minimum stay should be increased.

-
Click Save.
Automatic listing content update
With Automatic listing content update, you can turn on an automatic property descriptive content update and make your connection to Airbnb seamless. This means that whenever you edit your properties in Rentals United, the listings in Airbnb will be automatically updated. Find the important information below:
-
Setting can be turned on / off per account
-
It affects property descriptive content only
-
The changes are pushed to the channels every 4 hours. It means your updates should be visible on Airbnb within the next 24 hours, depending on the channel's processing time
-
Listings that do not meet minimum requirements to connect will not be updated. In case your changes are not visible in the channel, make sure that your properties meet these criteria. Note that you will not see any notification in Airbnb Property Settings if the property does not meet minimum content requirements.
-
In case the update is unsuccessful, you will see an update error in the Airbnb Property Settings.
Note: Automatic listing content update and pricing
Property descriptive content updates include fees, taxes, standard number of guests and maximum occupancy. These data can influence your pricing. Changes in extra guest price or discounts do not trigger an update.
Note: Failed property pushes
If you attempted to add a new property to Airbnb in the past and it was failed for some reason, the automatic listing content update feature will try to push the failed properties to the channel. If you do not wish these failed property pushes to be processed, make sure to clear the error that shows up after the initial push failed.
Note: Automatic listing content update scope
Automatic listing content update is identical as full content update - see here. It means it covers exactly the same areas as full content update.
-
In Rentals United platform, go to the Services tab.
-
Switch tab to My services.
-
Type Airbnb in the search box or scroll down through the list of available channels.
-
Unfold the channel section. Click the Down arrow button in the channel box.
-
Click Property Settings.
-
Switch the tab to Channel Settings.
-
Search for the Automatic listing content update section.
-
Choose the setting that you prefer.

-
Click Save.
Non-refundable rate discount
Now you can offer non-refundable bookings to your guests on Airbnb. A non-refundable option is a discount you can offer on top of other discounts and cancellation policies that gives you greater protection against cancellations. You can also become more competitive among other hosts in your location and increase your revenue. Here you can read more on how non-refundable rate discounts work in Airbnb.
Important information about non-refundable rate discount
-
Non-refundable rate is configured on the account level (not per property)
-
Non- refundable rate settings apply to properties you have now and add in future
-
Non-refundable rate cannot be created for properties on Limited Sync
-
Non-refundable rate cannot be created for Luxe apartments!
If you try to create a non-refundable rate for these listings, there will be no notifications displayed and the operation will appear successful. If you do not see a non-refundable rate created for your Airbnb listing, make sure the listing is not Luxe before you create a ticket.
-
In Rentals United platform, go to the Services tab.
-
Switch tab to My services.
-
Type Airbnb in the search box or scroll down through the list of available channels.
-
Unfold the channel section. Click the Down arrow button in the channel box.
-
Click Property Settings.
-
Switch the tab to Channel Settings.
-
Search for the Non-refundable rate discount section and find the account you want to have anon-refundable rate.

-
Check the checkbox and set the discount value.
Your booking final price (after fee, tax and other discounts are added) will be in the end discounted with the value you put here. For example, if your final price of the refundable rate is 150 EUR and you put 10% non-refundable discount, the non-refundable rate in Airbnb will be 135 EUR.
-
Click Save.
Once you configure the non-refundable rate, all new properties added to Airbnb in future will have a non-refundable rate available and will inherit the above settings.
-
Update the listing content in the channel as described here or wait till the next synchronization run (see Automatic listing content update).
Non-refundable rate is created for each listing in the Airbnb dashboard and you can view them there only. You will not see a non-refundable rate in the Rentals United dashboard.
Example: Mapped properties
If you map a listing existing in Airbnb to a property in Rentals United, you need to make sure non-refundable rate is created correctly:
-
Map the listing as described here. Make sure to set the synchronization mode to Sync Everything.
-
Update the listing content in the channel as described here or wait till the next synchronization run (see Automatic listing content update).
Example: Inactive properties
If you turn non-refundable rate on and some of your properties are inactive, they will not have these settings immediately after they are activated again. Update the listing content in the channel as described here or wait till the next synchronization run (see Automatic listing content update).
Example: Remove non-refundable rate
If you want to remove non-refundable rate, remove the checkbox and save the settings. Non-refundable rate will be removed from Airbnb. No additional steps are required.
After successfully setting up the non-refunable rate discount, your guests will see two booking options after having selected your property to book:
-
Refundable
-
Non-refundable (less expensive)

Sending fees and taxes
If you have had taxes in Airbnb before and now you want to use fees v1, fees v2
-
If you connected to Airbnb after 2023-08-10, you have Airbnbfees and taxes v3 enabled by default.
-
If you connected to Airbnb before, you are using one of our Channel Settings. Note that legacy solutions are no longer developed and we recommend upgrading to Airbnbfees and taxes v3 , which is a complete solution for all your fees and taxes and preserves all Airbnb functionalities.
-
In Rentals United platform, go to the Services tab.
-
Switch tab to My services.
-
Type Airbnb in the search box or scroll down through the list of available channels.
-
Unfold the channel section. Click the Down arrow button in the channel box.
-
Click Property Settings.
-
Switch the tab to Channel Settings.
-
Search for the Sending fees and taxes to Airbnb section.
-
Select the option that suits you the best.

Note: Fees and taxes v3
-
Fees and taxes v3 is available only in the new design
-
Before you select fees and taxes v3, make sure that you meet all the requirements described here
-
After you select fees and taxes v3, make sure to check in all checkboxes before you save
-
If you cannot see the option selection, it means you are running on the most advanced option - fees and taxes v3 and it is not possible to upgrade any further or downgrade.
-
-
Save your settings.
-
New settings will be live after the manual or automated listing content update.
Cancellation Policy
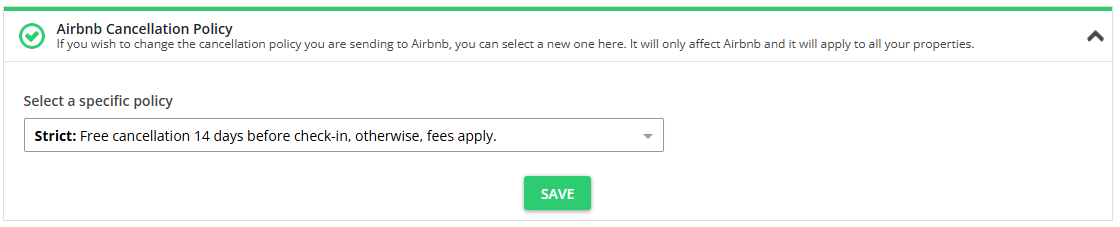
All Airbnb cancellation policies are listed in the Channel Settings tab. You can choose your one cancellation policy option that will be applied for all your account. Choose your cancellation policy from the list:
| ID | Name | Description |
|---|---|---|
| 0 | Property specific | Considers the policy set at the property level and checks it against available system options. |
| 1 | Flexible | Guests can cancel at least 24 hours before check-in for a full refund. If canceling after check-in, host will receive 100% for each night the guest stays, plus one additional night. |
| 2 | Moderate | Guests can cancel at least five days before check-in for a full refund. If canceling after that, host will receive 100% for each night the guest stays, plus one additional night, and 50% for all unspent nights. |
| 3 | Strict | Guests can cancel within 48 hours of booking and at least 14 days before check-in for a full refund. If canceling more than 14 days before check-in but not within 48 hours of booking, host will receive 50% for all nights. If canceling between seven and 14 days before check-in, host will receive 50% for all nights. After that, host will receive 100% for all nights. Only applicable to selected listings. |
| 4 | Super Strict 30 Days | Guests can cancel at least 30 days before check-in for a 50% refund. After that, host will receive 100% for all nights. |
| 5 | Super Strict 60 Days | Guests can cancel at least 60 days before check-in for a 50% refund. After that, host will receive 100% for all nights. |
| 6 | Firm | Guests can cancel at least 30 days before check-in for a full refund. If canceling between seven and 30 days before check-in, host will receive 50% for all nights. If cancelled less than seven days before check-in, host will receive 100% for all nights. If booked fewer than 30 days before check-in, guests can cancel within 48 hours of booking and at least 14 days before check-in for a full refund. |
| 7 | Limited | Guests who cancel 7-14 days before check-in get 50% back. After that, their trip is non-refundable. Only applicable to selected countries. * |
| 8 | Flexible (IT) | Guests can cancel at least 24 hours before check-in for a full refund. If canceling within 24 hours of check-in and by 12PM local time, host will receive 100% for the first night. Guest will receive full refund for remaining nights. If canceling after check-in, before 12PM local time, guest will receive full refund for unspent nights, excluding fees. If canceling after check-in, after 12PM local time, guest will receive full refund for unspent nights, excluding that night and fees. |
| 9 | Moderate (IT) | Guests can cancel at least seven days before check-in for a full refund. If canceling within seven days before check-in and by 12PM local time, host will receive 50% accommodation cost. If canceling after check-in, before 12PM local time, host will receive 50% for each unspent night. If canceling after checking, after 12PM local time, host will receive 50% for each unspent night, including that night. |
| 10 | Strict (IT) | Guests can cancel at least 30 days before check-in for a full refund. If canceling within 30 days before check-in and by 12PM local time, host will receive 50% accommodation cost. If canceling after check-in, before 12PM local time, host will receive 50% for each unspent night. If canceling after check-in, after 12PM local time, host will receive 50% for each unspent night, including that night. |
| 11 | Super Strict 30 Days (IT) | Guests can cancel at least 30 days before check-in for a full refund. If canceling within 30 days before check-in and by 12PM local time, host receives 100% of accommodation cost excluding fees. |
| 12 | Super Strict 60 Days (IT) | Guests can cancel at least 60 days before check-in for a full refund. If canceling within 60 days before check-in and by 12PM local time, host receives 100% of accommodation cost excluding fees. |
Refer to this Airbnb Help Centre article for details about the cancellation policies and applied fees. The cancellation policy terms differ depending on the length of stay or the property's location. In any case, if cancellation policies are selected by property managers who are not eligible, you will see 'Invalid cancellation policy' error in the Property Settings.
* Limited option is allowed in the listed countries:
-
Canada
-
Argentina
-
Netherlands
-
Sweden
-
Poland
-
Turkey
-
Philippines
-
Morocco
-
South Africa
-
Chile
-
Colombia
Starting from March 23rd 2019, Airbnb requires business hosts to go through verification before they can use a Super Strict Cancellation Policy. In the following cases:
-
If the client is a business host and switches to a Super Strict Cancellation Policy,
-
If the client adds a property with Super Strict Cancellation Policy and is not verified,
, then their properties will display errors in Rentals United prompting them to get verified.
-
In Rentals United platform, go to the Services tab.
-
Switch tab to My services.
-
Type Airbnb in the search box or scroll down through the list of available channels.
-
Unfold the channel section. Click the Down arrow button in the channel box.
-
Click Property Settings.
-
Switch the tab to Channel Settings.
-
A list of available custom policies opens.
-
Unfold the Cancellation Policy section. Select one of the cancellation policies available in the dropdown list.
-
Click the Save button.

Default channel mark-up
With the default mark-up settings, you can select the default mark-up which will be automatically applied when adding a new property to the sales channel. If you set the default mark-up, all properties that are being newly added to the account will have the default channel mark-up value automatically suggested. The default mark-up can be set on the account level.
-
In Rentals United platform, go to the Services tab.
-
Switch tab to My services.
-
Type Airbnb in the search box or scroll down through the list of available channels.
-
Unfold the channel section. Click the Down arrow button in the channel box.
-
Click Property Settings.
-
Switch the tab to Channel Settings.
-
Open the Default channel mark-up settings.
-
Tick the Change fee mark-up for this channel and provide the value.
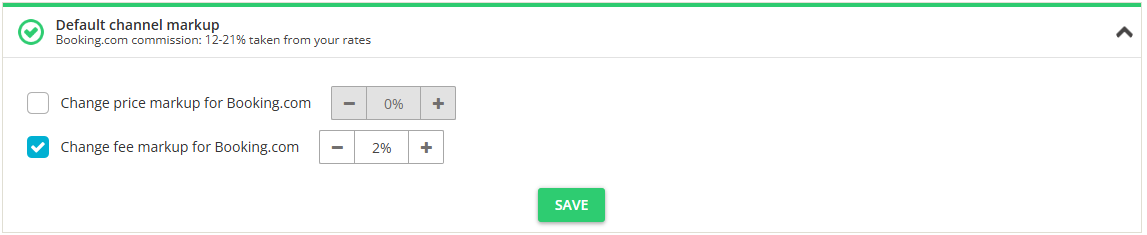
-
Save.
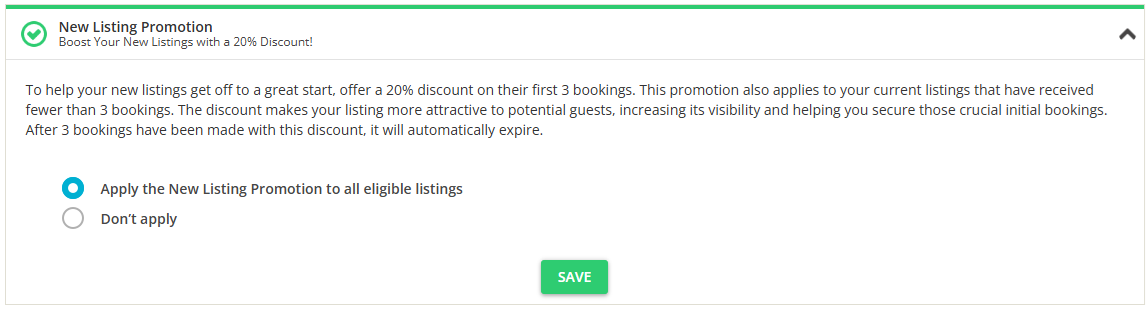
New Listing Promotion
New Listing Promotion is a new type of a promotion exclusive for Airbnb. New Listing Promotion works by applying the 20% discount for the first 3 bookings. If you enable New Listing Promotion, it will apply to all listings that has not yet received 3 bookings (new and existing listings). After the listing is booked 3 times, this promotion expires automatically.
By enabling the New Listing Promotion, you:
-
Boost the performance of your brand-new listings.
-
Get your first bookings faster.
-
Attract new guests and get your first reviews easier.
Before you start
New Listing Promotion takes priority over other discounts and does not stack with them (see here for a list of discounts available in the connection with Airbnb). For example, if you have already set up a discount for the last-minute bookings and, then, you have enabled the New Listing Promotion, the only price discount that will apply will be the New Listing Promotion.
Prerequisites
You can enable New Listing Promotion if you meet the following requirements:
-
You listing has not yet received 3 bookings.
-
Smart Pricing is deactivated in your Airbnb account
How it works
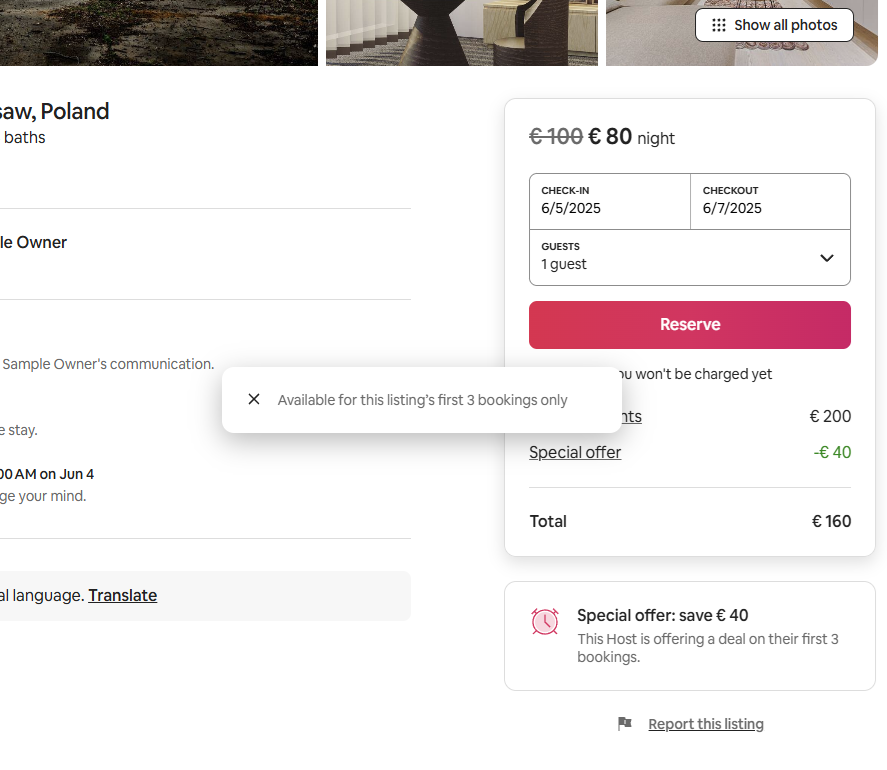
New Listing Promotion works by applying the 20% discount for the 3 first bookings.
The 20% discount value is calculated from the base rent price (without fees, taxes and other discounts).
How to turn it on / off for all listings
If you are a new client, you can activate the New Listing Promotion while connecting to Airbnb for the first time (in the channel checklist - see here).
If you are already connected to Airbnb, you can enable the New Listing Promotion for all listings at once in the Channel Settings.
-
Go to Channel Settings.
-
Click the New Listing Promotion tab.
-
Change the New Listing Promotion settings.
-
Turn on: Select Apply the New Listing Promotion to all eligible listings. This option causes the promotion to apply to all eligible listings.
-
Turn off: Select Do not apply. This option causes the promotion to be removed from all listings. Bookings which were made during the promotion will keep the discounted prices.
-
-
Click Save.
The promotion is instantly available in Airbnb. Guests will see that this special promotion is applied when booking any of your eligible listing.
How to turn it on / off for individual listings
You can turn the New Listing Promotion for individual listings directly in Airbnb. Enabling it in Airbnb gives you more control over the listings to which the New Listing Promotion is applied.
-
Go to your Airbnb platform and go to your Calendar.
-
Select your eligible new listing.
-
Go to the Price settings tab on the right-side panel.
-
Scroll down to the Promotions section.
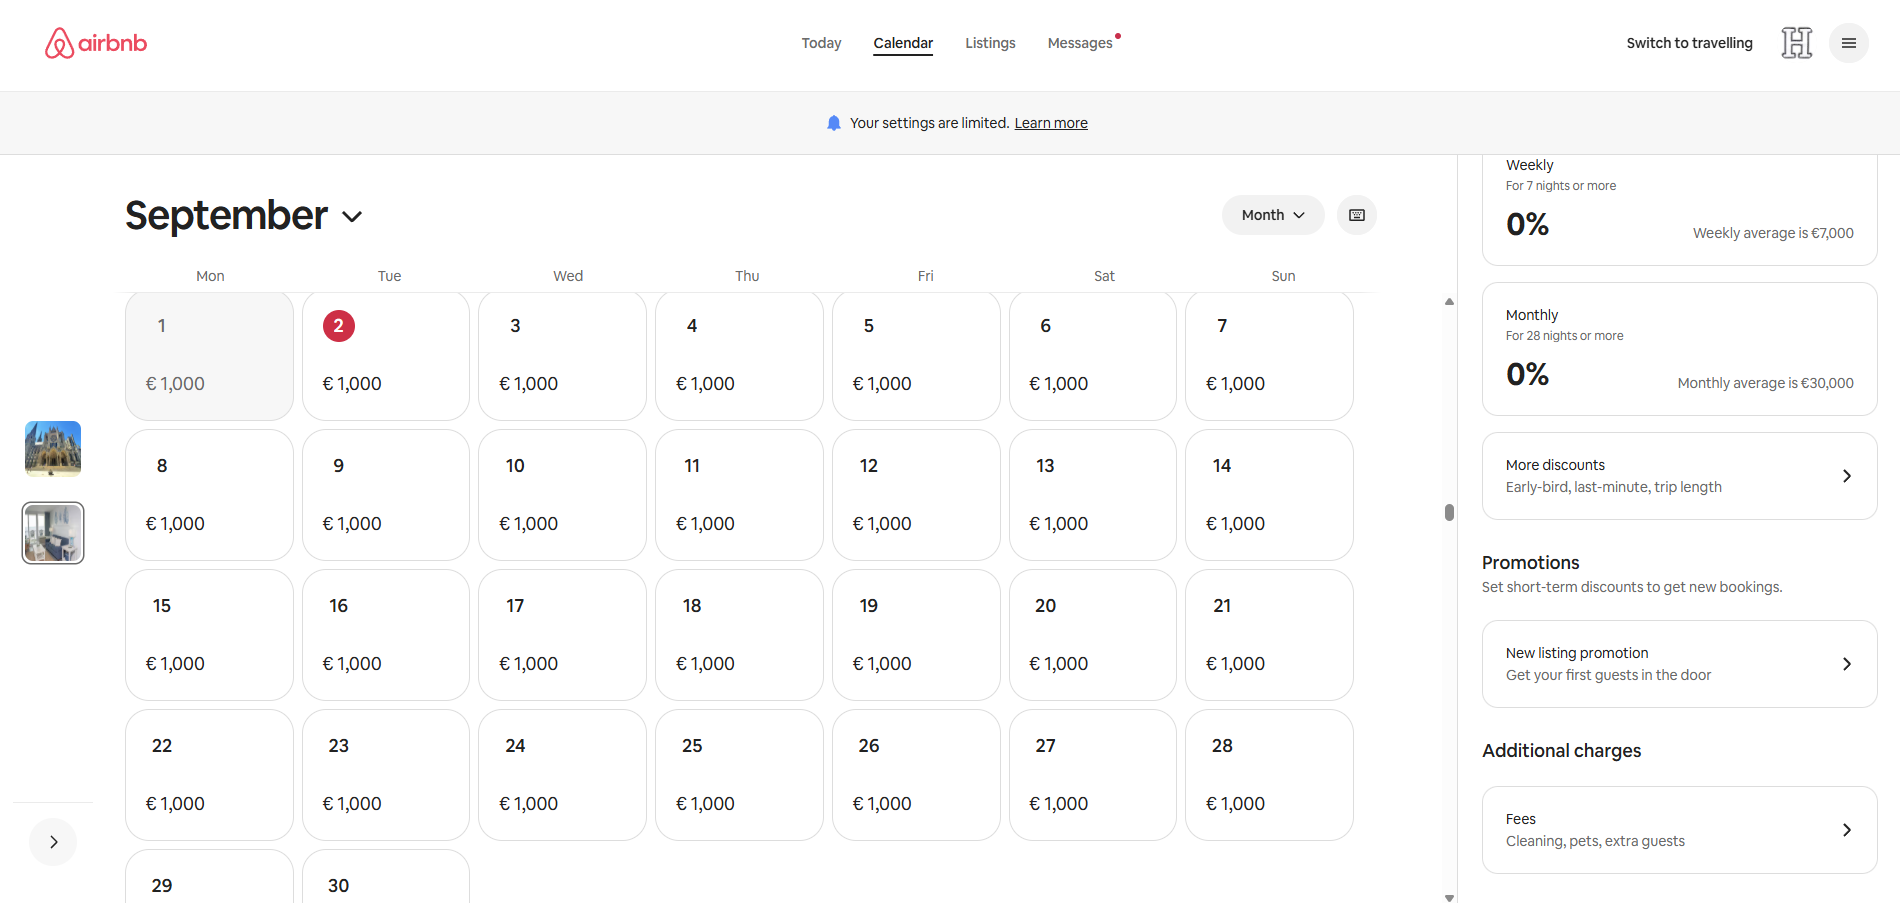
-
Click on the New Listing Promotion and click Apply promotion.
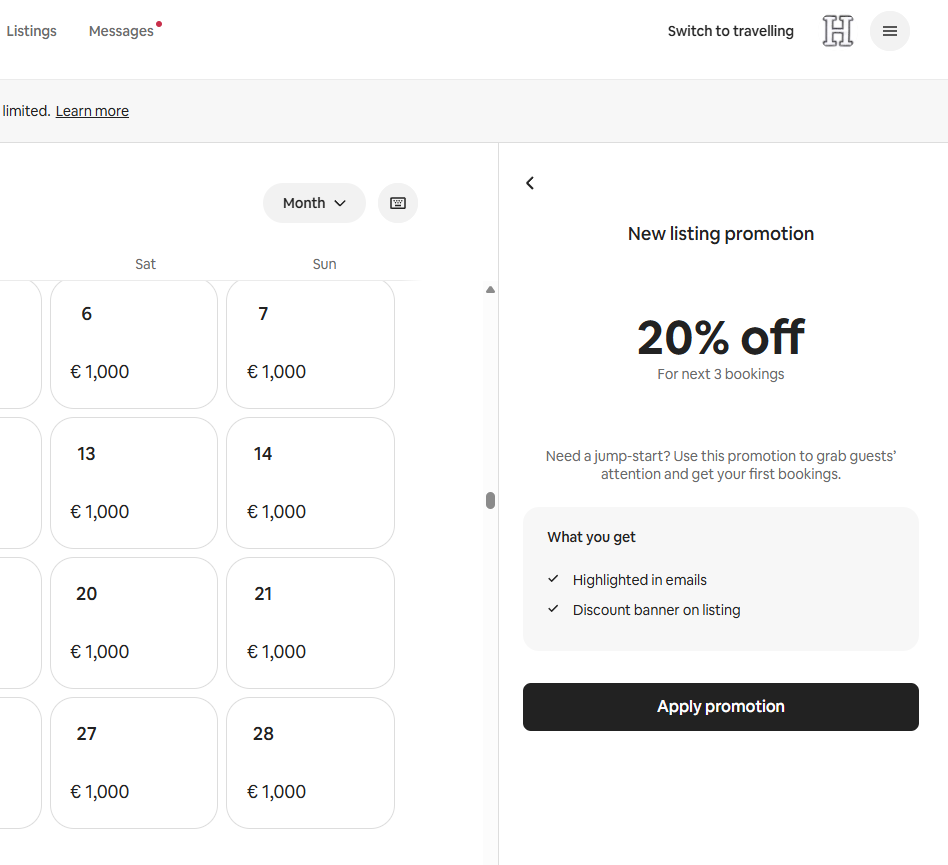
The promotion is instantly available in Airbnb fir this listing. Guests will see that this special promotion is applied when booking this listing.
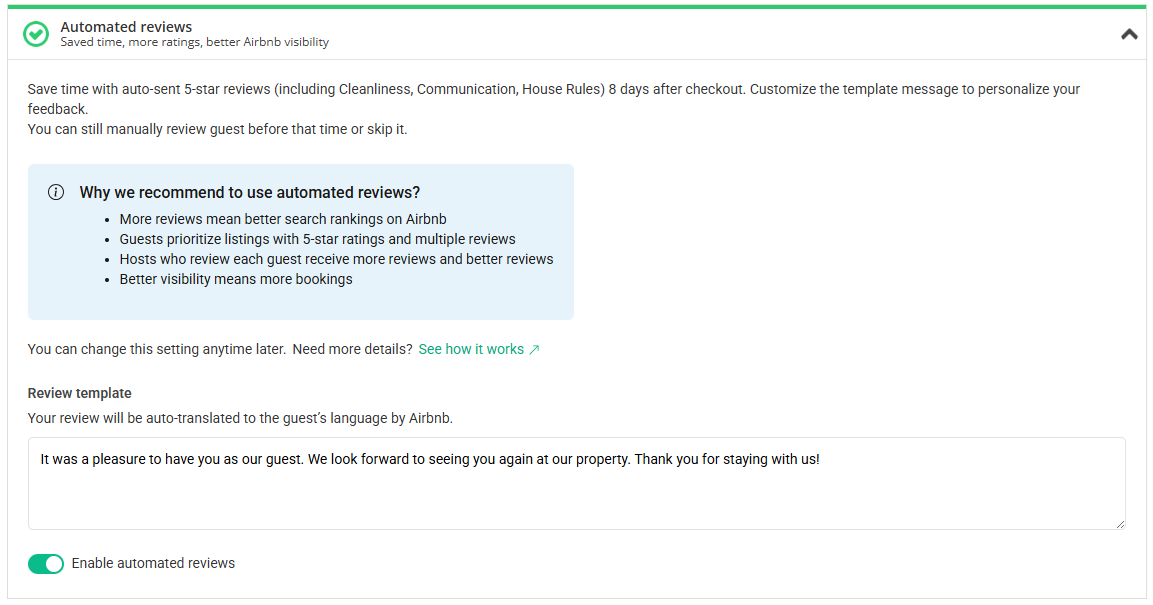
Automated reviews
According to Airbnb, a higher number of positive reviews is correlated to higher number of received bookings and, therefore, higher revenue. But who has the time to review each guest?
Rentals United has a feature to increase the number of reviews you receive from your guests. With our automated reviews in place, you can simply review your guests with one click of a button or even with no action required from you at all! It takes a minimum amount of time and brings great benefits. Your guests become curious to see your opinion on them and their stay and leave reviews in return.
-
Guest prefer listings with multiple reviews
-
More reviews better position your listings in the search ranking
-
Hosts who review each guest receive more and better reviews
How it works?
On the 8th day after the reservation ends, the review is automatically sent. The review includes:
-
A generic positive review text (which you can customise)
-
5-star rating (including cleanliness, communication and house rules)
How to enable?
-
In Rentals United platform, go to the Services tab.
-
Switch tab to My services.
-
Type Airbnb in the search box or scroll down through the list of available channels.
-
Unfold the channel section. Click the Down arrow button in the channel box.
-
Click Property Settings.
-
Switch the tab to Channel Settings.
-
A list of available custom policies opens.
-
Unfold the Automated reviews section.
-
In the Review template, customise your automated review text.
-
Do not include any specific details, as this message will be sent to all your guests.
-
Do not leave the field empty.
-
Do not include phone numbers, URLs or email addresses
You can use one of the following generic review texts:
-
Thank you for choosing to book our villa for your stay! We trust your experience was enjoyable, and we genuinely appreciated hosting you. We look forward to welcoming you back in the future, either to this villa or another from our specially selected collection. Safe travels, and once again, thank you for choosing [Company name].
-
Thank you for being a great guest!
-
-
Toggle the button to enable automated reviews.
-
Click the Save button.
Learn more how automated reviews work and check the FAQ section here.
Preparation Time Before Arrival / Booking lead time
You can now precisely control the Preparation Time Before Arrival and Request to Book settings for Airbnb listings.
-
PTBA - Specify the minimum booking lead time (greater control over your reservations).
-
RTB - Use this option to allow booking requests during the PTBA-restricted period (dedicated for property managers who work with instant bookings and who want to maximise booking opportunities).
This setting overrides your existing PTBA and RTB settings from Step 5: Price and availability for all listings connected to Airbnb. If you want to change the PTBA settings for an individual listing only - see here.
The settings with a higher priority override the settings with a lower priority. The priority of PTBA and RTB settings:
-
Priority 1: Property Settings > Manage (individual property settings)
-
Priority 2: Channel Settings (general channel settings)
-
Priority 3: Edit property
Changing PTBA and RTB settings in Channel Settings does not influence properties which already have individual settings in Property Settings > Manage. If you want to change the setting for all properties, make sure the settings in Property Settings > Manage are set to Default.
-
In Rentals United platform, go to the Services tab.
-
Switch tab to My services.
-
Type Airbnb in the search box or scroll down through the list of available channels.
-
Unfold the channel section. Click the Down arrow button in the channel box.
-
Click Property Settings.
-
Switch the tab to Channel Settings.
-
Open the Preparation Time Before Arrival / Booking lead time settings.
-
Choose the PTBA value for all your listings connected to Airbnb.
-
0h: This option removes the PTBA restrictions.
-
24h, 48h, 72h, 168h: The property's availability will be closed on the x number of hours before the end of the check-in day (23:59), e.g. 6 hours before the end of the check-in day (18:00).
-
Default: This option resets the PTBA settings to the value set

-
-
Allow RTB (Request to Book) option to let your guests book during the PTBA-restricted time.
-
If you select the Default option in the PTBA settings (above), only the PTBA time is inherited from Step 5: Price and availability. The RTB is set according to the checkbox setting.
-
-
Save.
Example 1: You want to set PTBA = 6 hours for all your properties for the first time.
-
Go to Channel Settings and set PTBA = 6 hours.
-
Click Save. The policy will update for all properties that do not have individual settings in Property Settings.
All your properties' availability will be closed 6 hours before the end of the check-in day. It means the same-day bookings will be allowed until 18:00.
Example 2: You want all your properties to have the PTBA = 24 hours and RTB turned off. You want one property to have PTBA = 72 hours and RTB turned on.
-
Go to Channel Settings and set:
-
PTBA = 24 hours
-
RTB = Checkbox unchecked
-
-
Click Save. The policy will update for all properties that do not have individual settings in Property Settings.
-
Go to Property Settings > Choose property X > Click Manage, and set:
-
PTBA = 72 hours
-
RTB = Checkbox checked
-
-
Click Save.
All your properties' availability will be closed on the entire check-in day. Only the property X will be available to booking requests 72 hours before the end of the check-in day. For example, if the check-in is on 3rd September, the property X's availability will be closed already on the 1st September.
Example 3: You have different settings for different properties and want to unify them by removing PTBA and turning off RTB.
-
Go to Channel Settings and set:
-
PTBA = 0
-
RTB = Checkbox unchecked
-
-
Click Save. The policy will update for all properties that do not have individual settings in Property Settings.
-
Go to Property Settings > Choose property X > Click Manage, and set (for properties with individual settings):
-
PTBA = Default
-
RTB = Checkbox unchecked
-
-
Click Save.
Example 4: You want to set the default settings for all your properties.
-
Go to Channel Settings and set the desired settings:
-
PTBA = 72h
-
RTB = Checkbox checked
-
-
Click Save. The policy will update for all properties that do not have individual settings in Property Settings.
-
Go to Property Settings > Choose property X > Click Manage, and set (for properties with individual settings):
-
PTBA = Default
-
RTB = If you have ever changed this setting, there is currently no possibility to set the RTB to the default value. You need to manually set the desired value. In this case, the checkbox should be checked to match the policy in Channel Settings.
-
-
Click Save.